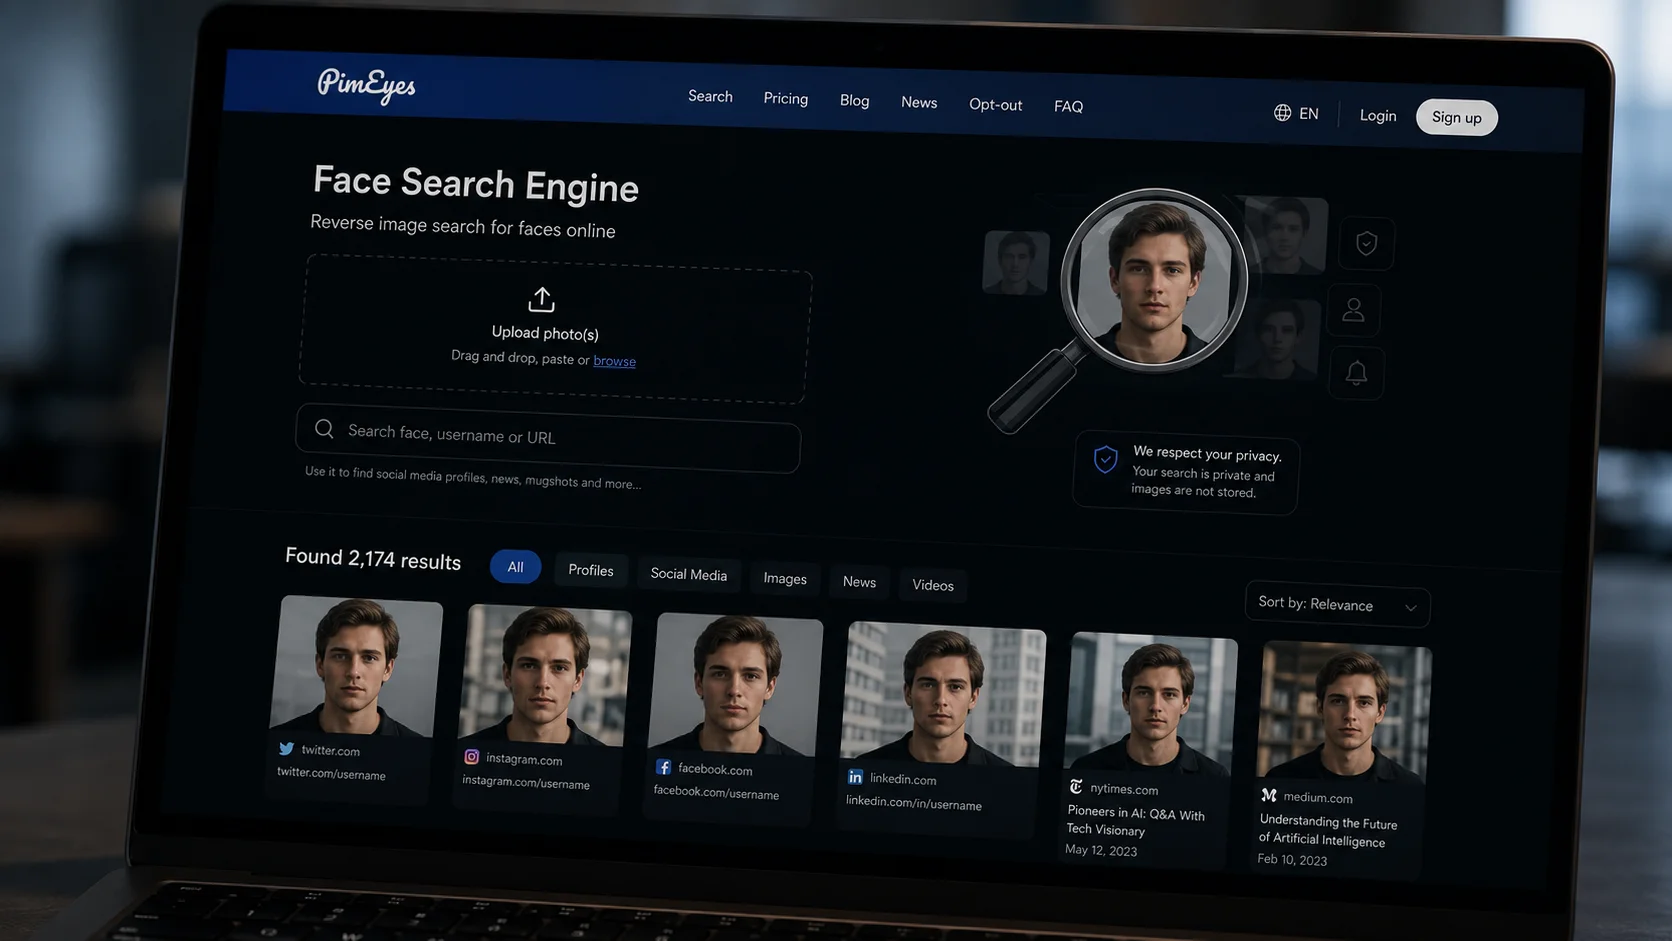
You have a photograph and nothing else. A screenshot from a chat, an avatar from a listing, a frame from an event. The first page of results offers you thirty "best services of 2026" and Telegram bots promising a full dossier in five minutes. The problem is that a list of services is not a method. Tools change every six months; results come from discipline — the right order of operations and an honest check of what you found.
Let's walk through the process the way an analyst builds it: from a single frame to a confirmed identity, with the exact points where it's easy to go wrong. And let me state the main trap of this topic up front — face search almost never gives you an answer, it gives you a candidate. The gap between a candidate and a person costs reputations, and sometimes someone's freedom: in 2026, the United States documented wrongful arrests based on face matches where the algorithm was confident and the human turned out to be the wrong one.
The second half of this article is the mirror image. If a profile can be assembled from a photograph, then it can be assembled from your photograph too. So the end covers what actually breaks recognition, what only works in the movies, and how to pull your face out of the search indexes.
Two different searches everyone confuses#
Before opening any tool, you have to separate two fundamentally different mechanisms. Half of all failed searches come down to applying the wrong class of tool to the task.
Reverse image search looks for the same file or edits of it. The engine compares the whole picture: background, colors, composition, sometimes the file hash. That's how TinEye, Google, and Bing work. Perfect for finding the origin of an avatar or catching a reused photo. Useless if you need the same person in a different shot — different background, different clothes, and to this kind of engine that's simply another image.
Reverse face search looks for the same person. The engine crops out the face and turns it into an embedding — a vector of several hundred numbers describing the geometry: distance between the eyes, jaw shape, cheekbone ratios. From there it compares vectors, not pictures. That's why this search finds a person in different clothes, under different lighting, and years apart. That's how PimEyes, FaceCheck.ID, and Lenso work.
Everything else in this article follows from that mechanism. An embedding measures geometric similarity, not identity. Facial geometry is not unique within the vector's resolving power — which is why unrelated look-alikes consistently score high. Doppelgängers aren't a bug in this system, they're a regularity, and that's exactly why a verification section is needed.
The base kit: what each tool covers#
This is common ground across every guide, so I'll compress it into one table. The value isn't the list — it's what task each tool actually solves.
| Tool | Class | What it covers | Cost |
|---|---|---|---|
| TinEye | image | File history, first appearance online, altered versions | Free |
| Yandex Images | image (+partly faces) | Strongest across the Russian-language web and Cyrillic; often finds "the same person" too | Free |
| Google Lens | image | Text, objects, places in the shot; barely returns faces | Free |
| Lenso.ai | face | Sorts results into "same person" vs "same file" | Free tier + paid |
| PimEyes | face | Open web: blogs, media, archives. Barely indexes social networks | Paid |
| FaceCheck.ID | face | Social networks, dating, scam databases — what PimEyes doesn't touch | Paid |
| Search4Faces | face | VK, OK, Clubhouse avatars | Free on the site |
The key takeaway from the table: PimEyes and FaceCheck.ID index different parts of the internet. They aren't competitors but complementary sources — their results overlap only partly. So "which service is best" is the wrong question. The right one is what order to run them in.
The workflow: order beats tools#
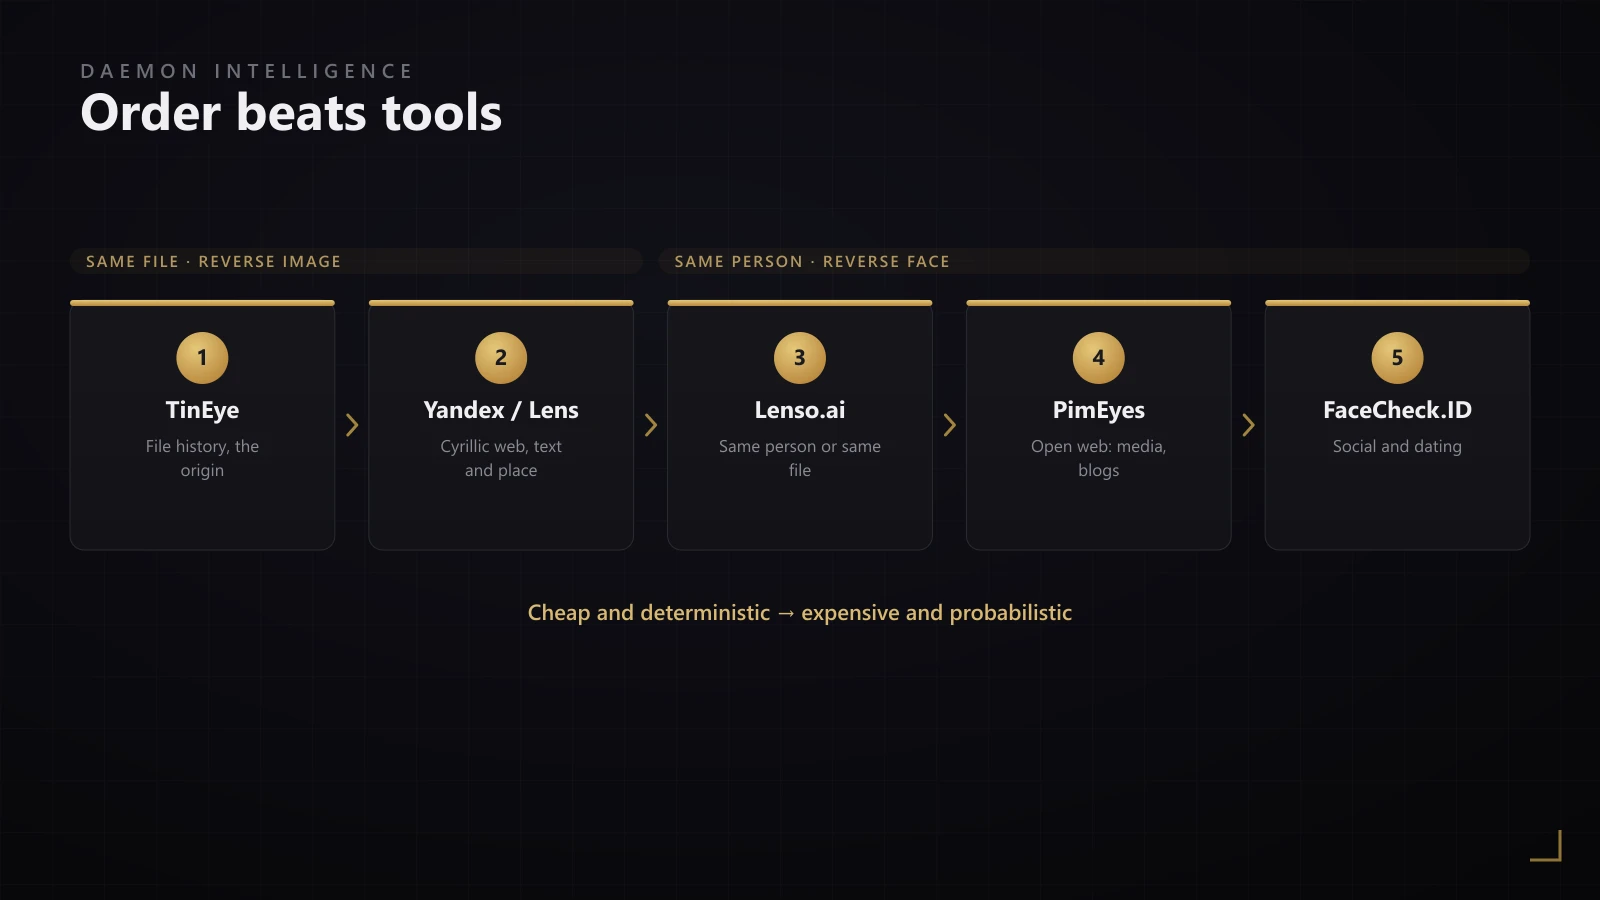
The general logic: cheap and deterministic first, expensive and probabilistic second. A same-file search gives an unambiguous answer (the file is either in the index or not) and often leads straight to the original source. A face search gives a probabilistic list of candidates that you then have to work by hand.
The opening fork#
The order depends on what you have going in.
You have an avatar or profile picture. Start with reverse image search. Avatars get reused: the same file is almost certainly sitting on other platforms too, and sometimes it was lifted from a stock library or someone else's account — in which case the investigation ends at step one with the verdict "this is a catfish."
You have only a face with no context. Reverse image search is nearly useless if this particular file was never published anywhere. Go straight to the face engines.
The photo has context — a sign, an interior, a recognizable landscape. Then both classes work, plus manual analysis: the background serves as independent confirmation of a candidate found by face.
Then the order itself:
- TinEye, sorted by "oldest." Gives the date the file first appeared online. If a "fresh selfie" from a chat first surfaced in 2018 on someone else's site, you can stop there.
- Yandex Images, then Google Lens. Yandex has historically been strong on faces in the Russian-language segment; Lens is more likely to pull text off a sign or identify a location.
- Lenso.ai. Useful because it splits results into "same person" and "file duplicates" — a cheap way to keep the two tasks from blurring together.
- PimEyes. Your main coverage of the open web.
- FaceCheck.ID. The finishing pass over social and dating.
The two-votes rule: one hit from one engine is a lead. Two independent hits in different coverage zones (say, PimEyes and FaceCheck) is already a meaningful signal. Below we'll see why even that isn't enough for a conclusion.
If the photo is poor: crop, upscale, and its main trap#
The engine builds an embedding from the face only, so clutter in the frame hurts detection. Crop to head-and-shoulders, face large and centered. For face search you don't have to remove the background — the vector ignores it; for reverse image search the background matters, and there a crop changes results more.
Quality restoration is trickier, and I want to dwell on it, because nobody writes about this trap and the cost of the mistake is high.
The standard advice "run it through a neural upscaler" is technically correct: GFPGAN does well on heavily degraded and old shots, CodeFormer gives you control through a fidelity weight parameter w in the range 0 to 1, and Real-ESRGAN suits general frame upscaling.
But all of these models are generative. They don't "restore" lost pixels — they synthesize plausible ones. On a poor original, the network literally paints in a face that wasn't in the pixels. Then the unpleasant part happens: the embedding shifts, and you're now searching not for the person but for an averaged guess about them. Matches after such an upscale look convincing and can be a pure artifact.
Hence the practical rules:
- In CodeFormer set
wcloser to 1 — this shifts the balance from "pretty" toward "closer to the original identity." - Run the search on both the original and the restored image, comparing results.
- A match found only on the upscaled photo and not confirmed by the original or by context does not count.
Upscaling is a tool for improving detection, not a source of truth.
Angles are simpler: non-frontal faces, glasses, and masks degrade results across every engine without exception, because the models are trained predominantly on frontal shots. FaceCheck.ID advertises itself as more robust on difficult frames — test that on your own material, there are no independent public benchmarks. A different workaround actually works: run several different shots of the same person one by one, each with its own embedding and its own results. A profile that surfaces on two independent photographs is a reliable candidate.
Pivot: from the face to the rest of the footprint#
The face is an entry point, not a finish line. The page you find almost always hands you the next identifier: a nickname, a name, a link to a profile. From there the usual OSINT loop runs: the nickname goes through Sherlock and Maigret across hundreds of platforms, which surfaces linked accounts, a city, a social circle, and new photographs — which you can feed back into face search.
That stage is covered in detail in the separate piece on finding someone by username and username enumeration. If a phone number turns up along the way, finding someone by phone number takes over — the identifiers converge and the picture closes.
How to verify a match and not catch a look-alike#
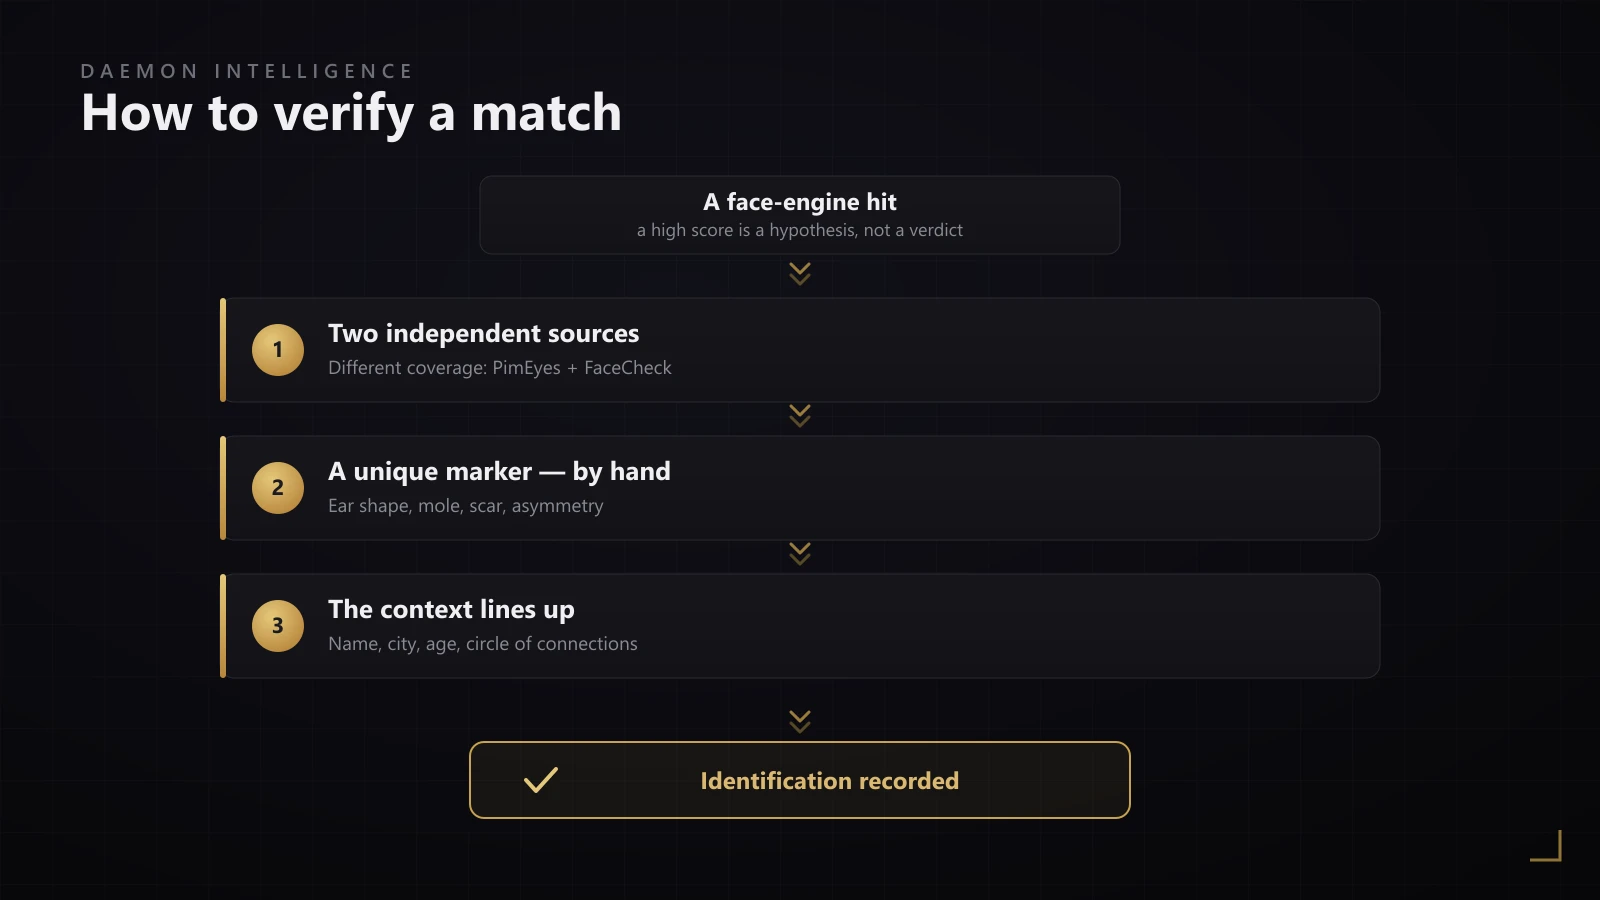
This is the core of the whole job and what separates an analyst from a person with a screenshot. The base principle: the face opens the door, but what identifies is not the face — it's the page it sits on. Pivot from the source, not from a feeling of resemblance.
The "two sources plus a marker" rule#
My working minimum, below which an identification is not recorded:
Two independent sources AND at least one matching unique physical marker — even if the engine shows a confidence of 90 or higher.
Step by step, what to check:
- The confidence score is a hypothesis, not a verdict. It measures vector similarity, not identity. A high score on a poor shot only means the model has nothing to grab onto.
- Cross-engine correlation. At least two engines with different coverage zones. If the same source shows up in both PimEyes and FaceCheck, the hypothesis strengthens.
- Verification of the image itself. Find the original and the earliest publication via reverse search, look at the metadata (
exiftool -a -G1 -s photo.jpg), check for signs of editing. The question here isn't "where else is this face," but "where did this particular file come from." - Unique markers — by hand. Moles, earlobe shape, freckle patterns, scars, eyebrow asymmetry. The embedding weights these weakly, but the human eye confirms them reliably. This is exactly where high-score false matches fall apart: if the subject has a notch on the left ear and the candidate doesn't, it's the model that's wrong, not your eye.
- Contextual identifiers. Name, city, age, occupation, circle of connections on the source page. Do the biographical facts line up across independent sources? The same person under different names across several profiles is itself a reason to be wary.
What the confidence numbers mean#
FaceCheck.ID returns results on a scale from 50 to 100, split into four levels: 90–100 a certain match (green), 83–89 a likely one (yellow), 70–82 uncertain, 50–69 weak. The service itself calls 83 and above a reliable threshold — with the caveat that the face in the uploaded shot must not be occluded. From that same threshold it raises a warning if the face matched scam resources, news material, adult content, escort sites, or offender registries. The warning flags the reputational context of the page found, not a recognition error — people confuse those two constantly.
Then it gets interesting. Public measurements of face-engine accuracy barely exist: figures like "67% accuracy" or "one in four matches is false" circulate across reviews, but I couldn't find a primary report behind them, and FaceCheck itself publishes no metrics. What the vendor does state is worth quoting instead of those numbers: a computer cannot establish guaranteed identity, and results must be corroborated with other data.
The systemic context comes from NIST FRTE — the U.S. government program that tests recognition algorithms (it was called FRVT until July 2023, and most write-ups still cite it under that name). Its measurements show that the false-match rate varies between algorithms and demographic groups by orders of magnitude. The practical conclusion: the same confidence score means different reliability for different people, and a "confident" result on a demographic underrepresented in the training data deserves harder scrutiny.
The cost of a skipped verification step is not hypothetical. In 2026 alone the U.S. documented at least eight wrongful arrests based on face matches: a woman mistaken for a fraudster from a camera frame and held in jail for over five months despite an ironclad alibi; a Florida man who, over three months in custody, lost his job, his home, and custody of his children. In every case the algorithm was "confident" — what was missing was exactly the subject of this chapter: independent confirmation.
Does the person even exist?#
A step almost everyone skips. Before searching for a person, rule out that the face is synthetic — generated by a StyleGAN-style model or diffusion. Otherwise you'll get either zero results or, worse, false matches with real people who resemble the averaged face from the training set.
The practical approach: run the shot through two detectors (for example, AI or Not for a quick first filter and Illuminarty, which additionally highlights suspicious regions). A disagreement between verdicts is a signal to dig by hand: asymmetry of pupils and earrings, a "floating" background, odd geometry of eyeglass frames, teeth.
One common confusion to head off: FotoForensics is not a neural-network detector. It's a classic forensic tool (error-level analysis); it catches compositing and splicing but is nearly useless against clean generative output.
And the main point about the detectors themselves: the high accuracy percentages they boast come from academic datasets. In the field — especially after the next generator ships — quality drops noticeably, because the detector was trained on yesterday's artifacts and the generator has already moved on. So no detector is proof, only a signal to look further.
When the face isn't found: working the background#
If the person never published their photographs, face search gives you nothing — there's simply nothing to search. Then the only remaining material is the frame itself.
Shadows and the sun. ShadowFinder from Bellingcat approaches it like this: you supply the ratio of an object's height to the length of its shadow plus the date and time, and the tool draws a band of possible coordinates on a map. Absolute sizes aren't needed — only the ratio is computed, so you can measure in pixels straight off the shot. The inverse task is chronolocation: if the location is known, the shadow determines the time of capture, using SunCalc. The value of the method is that shadows, unlike metadata, can't be edited in a settings menu.
Geolocation by neural network. There's been a shift here over the past two years. The open StreetCLIP model was trained on 1.1 million geo-tagged street-level shots from 101 countries and determines a location by architecture, vegetation, and road environment. On the IM2GPS benchmark it lands within 200 km in 45% of cases and within 750 km in 75%; you can run it locally. Among commercial options, Picarta stands out, strong on overhead imagery.
The GeoSpy case is telling: the service pinpointed a location from a photo in seconds, but in 2025 its maker, Graylark, closed public access after cases of stalking and pivoted to selling to law enforcement (the Miami-Dade Sheriff's Office and the LAPD among the buyers). Tools of this class are leaving the open market — which is the best illustration of how effective they are.
The Russian-language segment: what works, and what to avoid#
International guides ignore this section, but for anyone working Russian-language sources it defines the practice.
PimEyes has rejected requests from Russia since 2022: the company explained it as a risk that the service would be used to identify Ukrainian authors and activists. The list of blocked countries later grew to around three dozen. The block is tied to the user's location, not to technical browser fingerprints — the common claim that PimEyes "detects a VPN or incognito mode" has no support. The practical obstacle is more often payment: a Russian card can't buy the subscription.
Search4Faces searches VK avatars (the service's counter reports over 1.1 billion faces), main VK and Odnoklassniki photos, and Clubhouse avatars; the databases run to hundreds of millions of faces. But there's a limitation Russian-language guides keep quiet about: the main index was collected by 2020 (VK avatars from November 2019 to November 2020) and has only been topped up in spots since — the VK profile-photo dataset, for instance, was re-collected in December 2022–January 2023. A person who created an account or changed their avatar outside those windows won't be found. The service remains useful as a historical snapshot, not as a current database.
FindClone works, searches VK only, with a database mostly from 2018–2019. Trial access is 30 requests over 30 days, then tariffs start at around 99 rubles for 50 searches; because of sanctions, payment has to come from a card in Russia or a "friendly" country. Same stale-index problem, so treat it the same way: an archive, not the current state of the network.
Yandex Images remains the strongest reverse image search across the Russian-language web — thanks to its coverage of Cyrillic resources and the fact that Western engines deliberately limit face matching on privacy grounds, while Yandex does not.
Why "probiv" bots are a risk to you#
Separately and bluntly, because ads for these services fill the entire results page on this topic.
Telegram "probiv" (background-check) bots run not on open sources but on stolen personal-data leaks. Beyond the obvious legal and ethical side, there's a problem users don't grasp: your queries are stored too.
In June 2026, the outlet iStories reported that law enforcement gained access to the user data of the "Glaz Boga" (God's Eye) service — that is, to the record of who looked up whom. That changes the whole risk picture: you aren't an anonymous consumer of the service, you leave a trail that at some point ends up in someone else's hands.
And this isn't abstract: in October 2025, law enforcement seized Usersbox — one of the most popular probiv bots — and detained its owner. The ecosystem is under pressure: in 2026 Roskomnadzor throttled Telegram and named probiv services as one of the reasons. Add to that the volatility of the services themselves (owners get detained, databases get resold, bots change hands) and the unreliability of the output — data aggregated from heterogeneous leaks with no verification whatsoever. For a defensive task, a tool like this is doubly useless: it doesn't give a reliable answer and it creates a new risk.
The other side: how to make yourself harder to find by photo#
Everything above works against you too. If you're a public figure, an executive, or simply someone with years of presence online, your face is almost certainly already in the indexes. It's worth checking yourself — the principle is the same as in all of OPSEC for executives: see your own footprint before it's used against you.
The short version of what to do. The key fact: deleting a photo from a website does not remove you from the index — the face vector is stored separately from the source file, so two different actions are required. There is no single button, and every engine has its own channel: PimEyes and Lenso offer a free opt-out form, FaceCheck.ID verifies by selfie, Search4Faces works over email, and FindClone has no public mechanism at all. Sequence beats completeness here: close the sources you control first, file the requests second, or the index simply refills.
There is more mythology than practice in this area. Makeup, a head turn, a new hairstyle and weight change do not break the embedding — the geometry vector is invariant to them. Sunglasses beat a medical mask because they cover the periocular zone, but none of that touches images already published. Image cloaking like Fawkes (last release 1.0, April 2021) only affects what you post afterwards, and Glaze from the same lab is about protecting artists' style, not faces.
The full treatment — a map of every index with verified form addresses, the legal routes, the "disappear or watch" fork and a priority table — is in the separate piece on how to block face search. A broader treatment of erasing your digital footprint is in the piece on how to delete yourself from the internet.
Metadata#
A separate leak channel, unrelated to the face. A photograph can carry GPS coordinates, the device model, and the exact time of capture. Strip the metadata before publishing:
exiftool -all= -overwrite_original photo.jpg        # remove all metadata
exiftool -gps:all= -overwrite_original photo.jpg    # remove the geotag only
exiftool -a -G1 -s photo.jpg                         # check what's left
On Windows the same is available without installing anything: right-click the file → Properties → Details → "Remove Properties and Personal Information." Note that social networks often re-compress images and strip EXIF themselves, but not always: a file sent as a document usually keeps its metadata intact. This and adjacent mistakes are covered in the piece on digital hygiene mistakes.
Where this leads#
The order of operations matters more than the set of tools. Services go stale within six months, but the logic of "file first, then face, then confirmation" holds for years. A face match always remains a hypothesis, and only independent confirmation turns it into a conclusion: a second source plus a unique marker the algorithm weights weakly and a human notices at once.
The other side is exactly the same. If the method is reproducible, it's reproducible against you. The difference between people found in five minutes and people the search stalls on is usually not paranoia but a handful of decisions made in advance: which photographs reach the open web at all, whether the metadata is stripped, whether removal requests have been filed.
If you need to see your own digital footprint through the eyes of whoever will be collecting it — that's exactly what we do.
FAQ#
Can you find someone by photo if they're not on social media?#
Probably not. Face search only works with photos already indexed from the open web: PimEyes covers blogs, media, and archives; FaceCheck.ID covers social networks and dating; Search4Faces covers VK and OK avatars. If a person never published their photographs and never appeared in someone else's posts, there's simply nothing to search. In that case what's left is analysis of the frame itself — background, shadows, geolocation.
Which photo-search service is best?#
The question is framed wrong: the engines have different coverage zones and complement one another. The working order is TinEye for the file's history, then Yandex Images and Google Lens, then Lenso.ai, PimEyes, and FaceCheck.ID. One hit from one service is a lead. Two independent hits in different indexes is already a meaningful signal.
How do I check that a match is real and not a look-alike?#
The confidence score measures the geometric similarity of the face, not identity, so unrelated similar people consistently score high. The working rule: don't record an identification until there are two independent sources and at least one matching unique marker — ear shape, a mole, a scar, an asymmetry. Even at a score above 90.
Does PimEyes work in Russia, and is it safe to upload your own photo?#
PimEyes has blocked requests from Russia since 2022, and a Russian card won't pay for the subscription. Per the service's policy, an uploaded image is deleted within a few hours, and the search index is built from the public web rather than user uploads — but that's the vendor's own statement. Any upload of a photo to a third-party resource remains a handover of biometrics to a third party, and should be judged accordingly.
How do I remove my photo from face search?#
Every engine closes separately: PimEyes and Lenso.ai have a free opt-out form, FaceCheck.ID verifies by selfie or document, Search4Faces takes requests over email, and FindClone has no public mechanism. The limitation to understand: all of them delist you from the search index rather than deleting photos from the sites hosting them, so closing the sources comes first. A step-by-step map of every index with verified form addresses is in the piece on how to block face search.